Ever needed to tri-state an #esphome GPIO?
HIGH and LOW not enough for your projects?
Need a bit of high-Z or dual-use the pin as Input?
Here's my solution:

Ever needed to tri-state an #esphome GPIO?
HIGH and LOW not enough for your projects?
Need a bit of high-Z or dual-use the pin as Input?
Here's my solution:
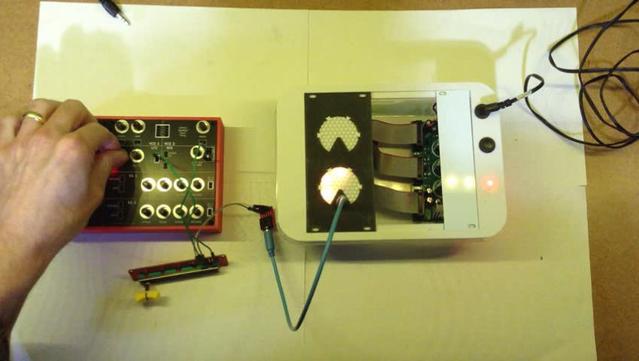
@rpimag I finally finished the EuroRack version of my "Krell" (from Forbidden Planet) display.
This one happens to be using a Tiny2040 from Pimoroni, so I don't know if that counts? :)
Revisiting my Duppa LED Rings this time using Waveshare Zero format devices to support USB MIDI CC controllers.
https://diyelectromusic.com/2025/04/06/duppa-i2c-midi-controller-part-4/

Forbidden Planet “Krell” Display – MIDI CC Controller – Part 2
This revisits my Forbidden Planet “Krell” Display – MIDI CC Controller using my Forbidden Planet “Krell” Display PCB with a Waveshare RP2040 to create more of a “all in one” device.
Warning! I strongly recommend using old or second hand equipment for your experiments. I am not responsible for any damage to expensive instruments!
If you are new to Arduino, see the Getting Started pages.
Parts list
PCB
This requires a built of the Forbidden Planet “Krell” Display PCB with the following:
I’ve used potentiometers that are their own knob, as they only poke through the casing by around 5mm or so.
If it you are able to get longer shaft pots, then that would probably be worthwhile.
Updated 3D Printed Case
This requires the following from the Krell Display 3D Printed Case:
This requires the following options in the OpenSCAD code:
show_frame = 1;
show_quadframe = 0;
show_insert = 1;
show_support = 0;
show_quadsupport = 0;
show_eurorack = 0;
show_eurorack_support = 1;

alg_pot1 = 1;
alg_pot2 = 1;
alg_cv   = 0;
The frame does not really take into account the PCB at present, but I’ve reached the “good enough I want to do something else” stage, so I’ve just added a couple of small cut-outs (using a hacksaw) for the two MIDI sockets, and am content that the components stick out a bit from the back.
This cutout has to be 10.5mm from the end, 6mm wide, and 5mm deep.
At some point I might go back and design a deeper frame that has the cut-outs included and some kind of snap-on back to make it a self-contained box.
But for now, this is left as an exercise for, well, anyone else 
Construction
I’ve used four brass 6mm spacers to screw into the mounting holes in the frame. Then the PCB can be inserted, taking care to squeeze in the 3D printed support around the LEDs and pots, and fixed with 20mm spacers which will also act as “legs”.
The Code
I’ve used a Waveshare Zero RP2040 and Circuitpython for this build. This is a combination of some of the test code used for the Forbidden Planet “Krell” Display PCB but with added MIDI.
The code supports both Serial and USB MIDI.
I wanted an equivalent of the Arduino map() and constrain() functions and didn’t immediate spot them in Circuitpython so wrote my own:
def algmap(val, minin, maxin, minout, maxout):
    if (val < minin):
        val = minin
    if (val > maxin):
        val = maxin
    return minout + (((val - minin) * (maxout - minout)) / (maxin - minin))
This allows me to map the analog read values (0 to 65535) down to MIDI CC values (0 to 127) whilst also allowing for some inaccuracies (I’ve treated anything below 256 as zero for example):
alg1cc = int(algmap(alg1_in.value,256,65530,0,127))
I’ve used the Adafruit MIDI library, which I’m still not really a fan of, but I wanted to include MIDI THRU functionality to allow the controller to sit inline with an existing MIDI stream. But it doesn’t seem to work very well.
I was already only updating the LEDs/MIDI CC if the pot values had changed, to cut down on the number of Neopixel writes required.
I experimented with changing the scheduling of the analog reads and MIDI but that didn’t seem to help very much. In the end I made sure that all MIDI messages queued up in the system would be read at the same time before going back to checking the pots.
    msg = midiuart.receive()
    while (msg is not None):
        if (not isinstance(msg, MIDIUnknownEvent)):
            midiuart.send(msg)
        msg = midiuart.receive()
It will do for now. Moving forward, I might try the Winterbloom SmolMIDI library. If that still doesn’t give me some useful performance then I might have to switch over to Arduino C.
Closing Thoughts
The MIDI throughput is disappointing, but then I’ve never really gotten on with the Adafruit MIDI library. I use it as USB MIDI on Circuitpython is so easy, so will need to do something about that.
I’m still deciding on the PCB-sized supports too. The original seemed to have nicer diffusion of the LEDs, but that could have been the difference between 5mm SMT neopixels and these THT APA106s which seem more directional in the first place.
And I really ought to finish the 3D printed case properly too.
So this is “that will do” for now, but I ought to come back and finish it off properly at some point.
Kevin


And just like that we have a functioning clock! currently running on a propmaker RP2040 but I will probably have to move over to something WiFi enabled before long #pcb #electronics #maker #RP2040 #RaspberryPi #jlcpcb #circuitpython @adafruit
TinyGo 0.37 is released! That was fast, especially with all the excellent work that made it in:
- updated WASI support with latest from the Bytecode Alliance
- faster speed+PIO support on RP2350
- new Linux GC
Plus critical fixes too!
Full changelog: https://github.com/tinygo-org/tinygo/releases/tag/v0.37.0
For #PsiDrive, I need to add a 16.5V rail (Vpp) to enable writing to Flash SSDs. Vpp from a SIBO machine is unregulated - although schematics tend to say 16.5V, the real voltage can be somewhere between 16V and 20V (I think I once measured 21V, but that could have been an unreliable multimeter). Flash SSDs have an LM317LM which then regulates down to the required voltage.
This video should be a good start.
I also need to fix a small bug in the last PCB, which sent 5V to Vbackup for RAM SSDs. It should be 3.7V, to match the coin cell battery. Admittedly it might not matter, but I don't know if I want to chance it.
Once I've done all this, I can move on to adding more features to libsibo, such as writing to SSDs and properly using the PIO in the #RP2040 and #RP2350.
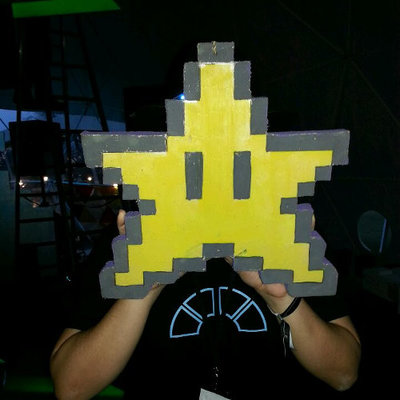
The corruption of the #Pimoroni Badger is complete! #esphome #eink #epaper #homeassistant #3dprinting #3dprinted #smarthome #scifi #StarWars #rp2040 #raspberrypi #RaspberryPiPico

Yet another MIDI monitor on yet another small, neat, microcontroller - this one the Waveshare RP2040 Matrix which has a great little 5x5 programmable LED matrix onboard.
And no, I'm not bored of these things yet :)
https://diyelectromusic.com/2025/02/22/waveshare-rp2040-matrix-midi-monitor/

Anyone know if the Circuitpython Neopixel implementation uses PIO on the RP2040? The existence of neopixel_write in the HAL for CP implies it does...
But if so, what if you have an application that also wants to use PIO? How are conflicts managed?
UART/I2C firmware for https://www.tindie.com/products/8086net/rp2040-interfacer-uarti2c/ RP2040 Interfacer is now available on https://github.com/8086net/RP2040_Interfacer-UART_I2C
(it's also supported by CircuitPython https://circuitpython.org/board/8086_rp2040_interfacer/ )
. To the side is the same board but reversed showing a button, LED and other components.")
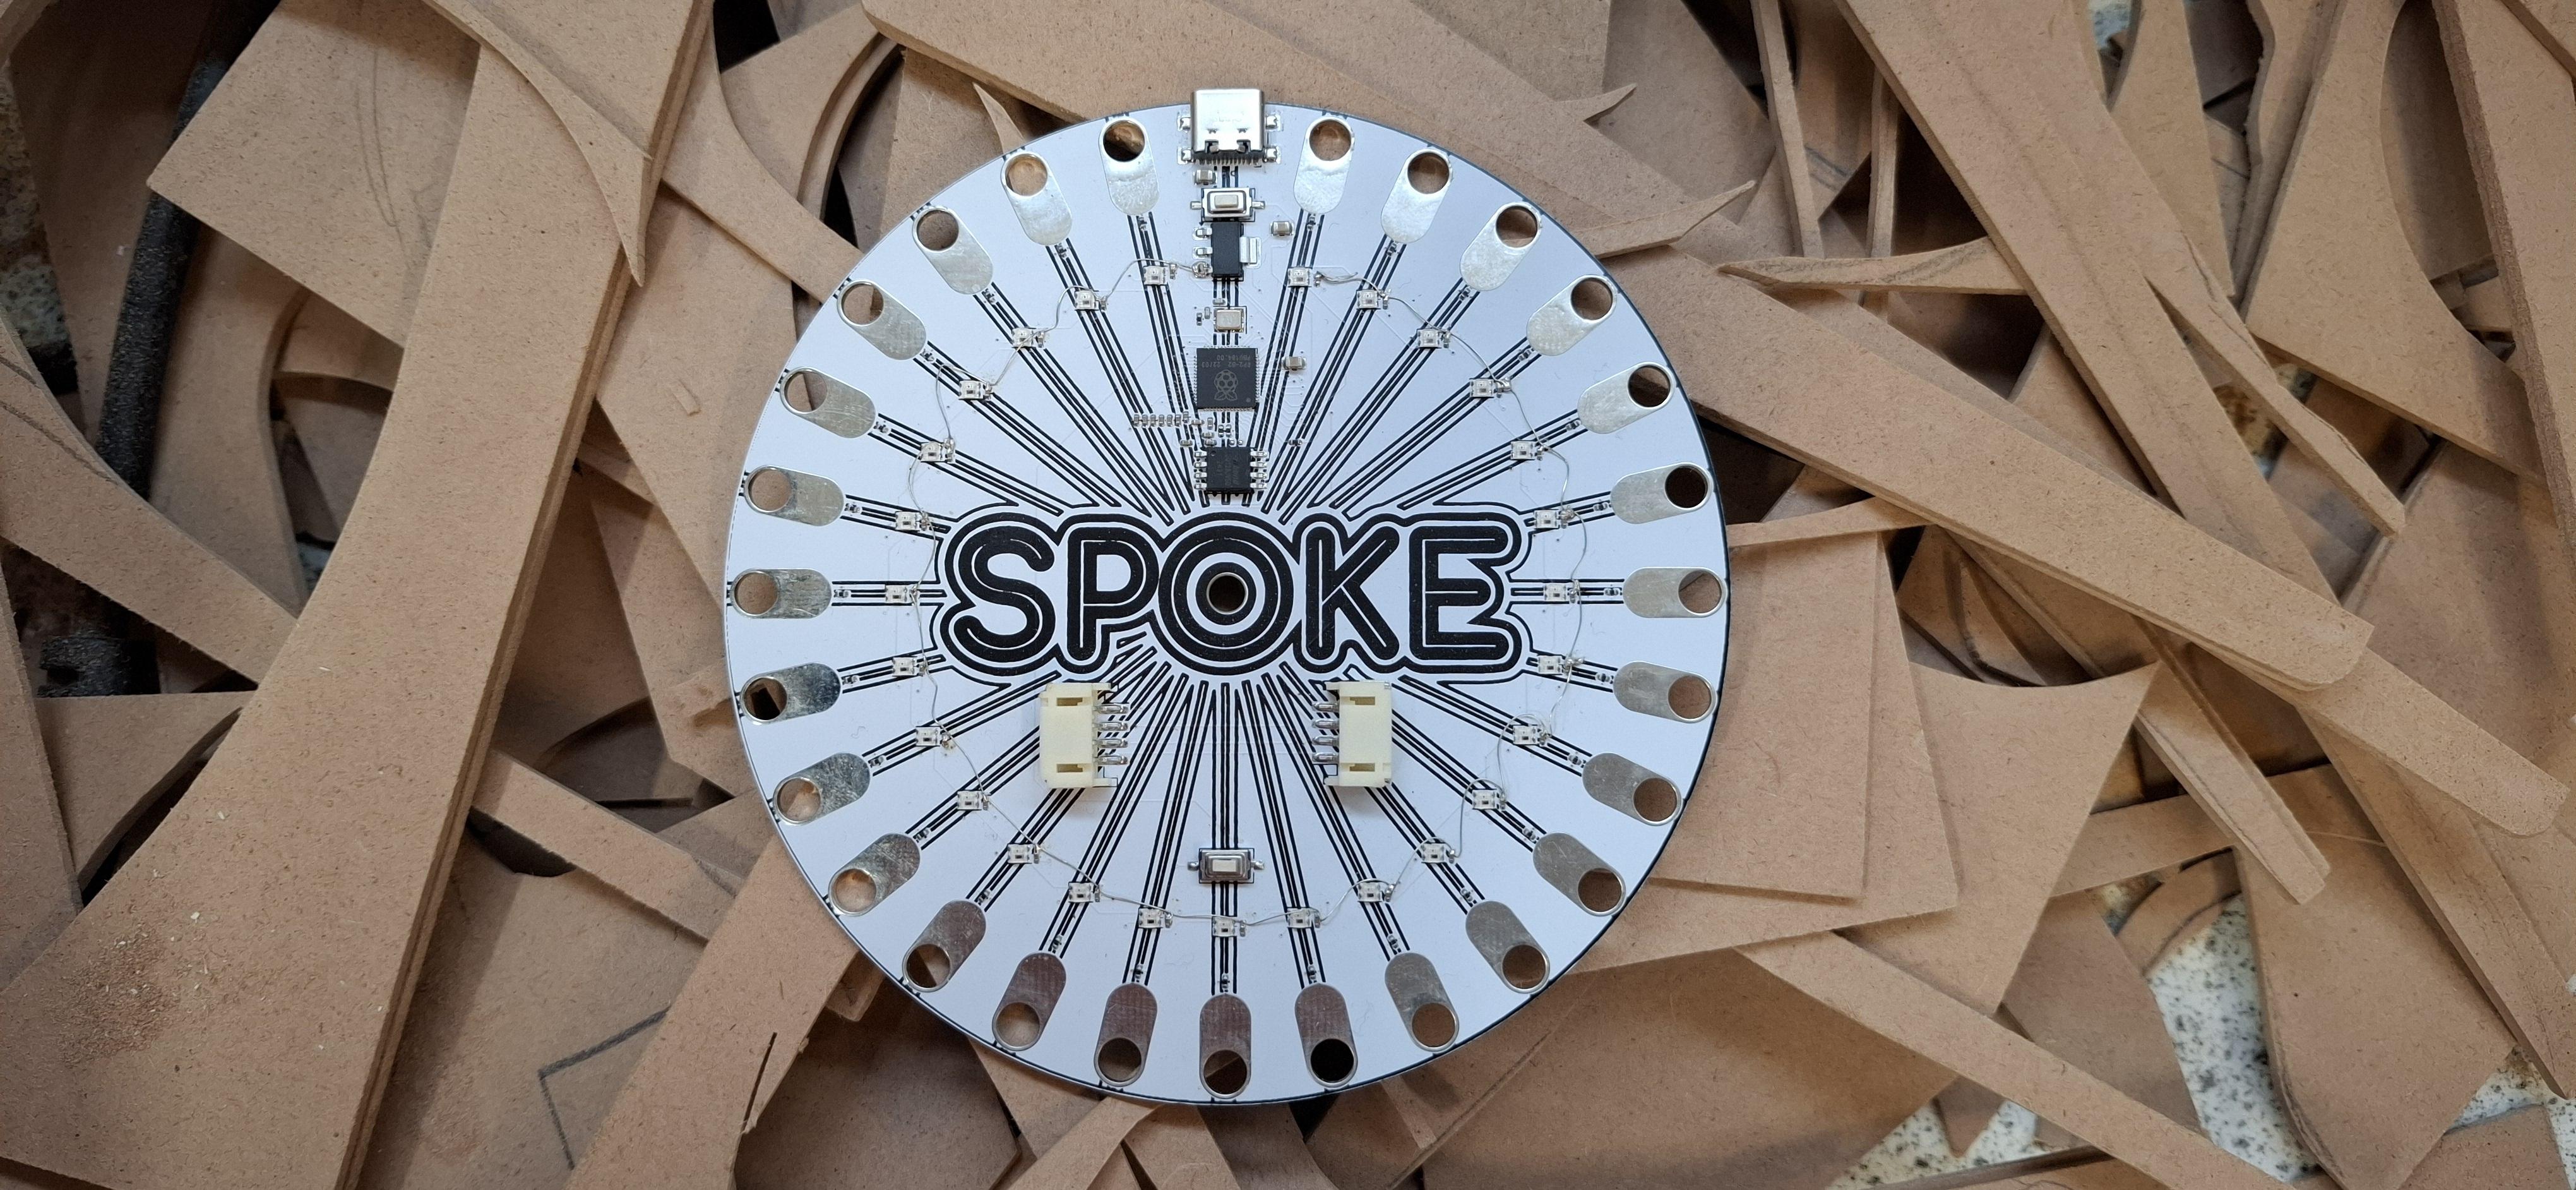
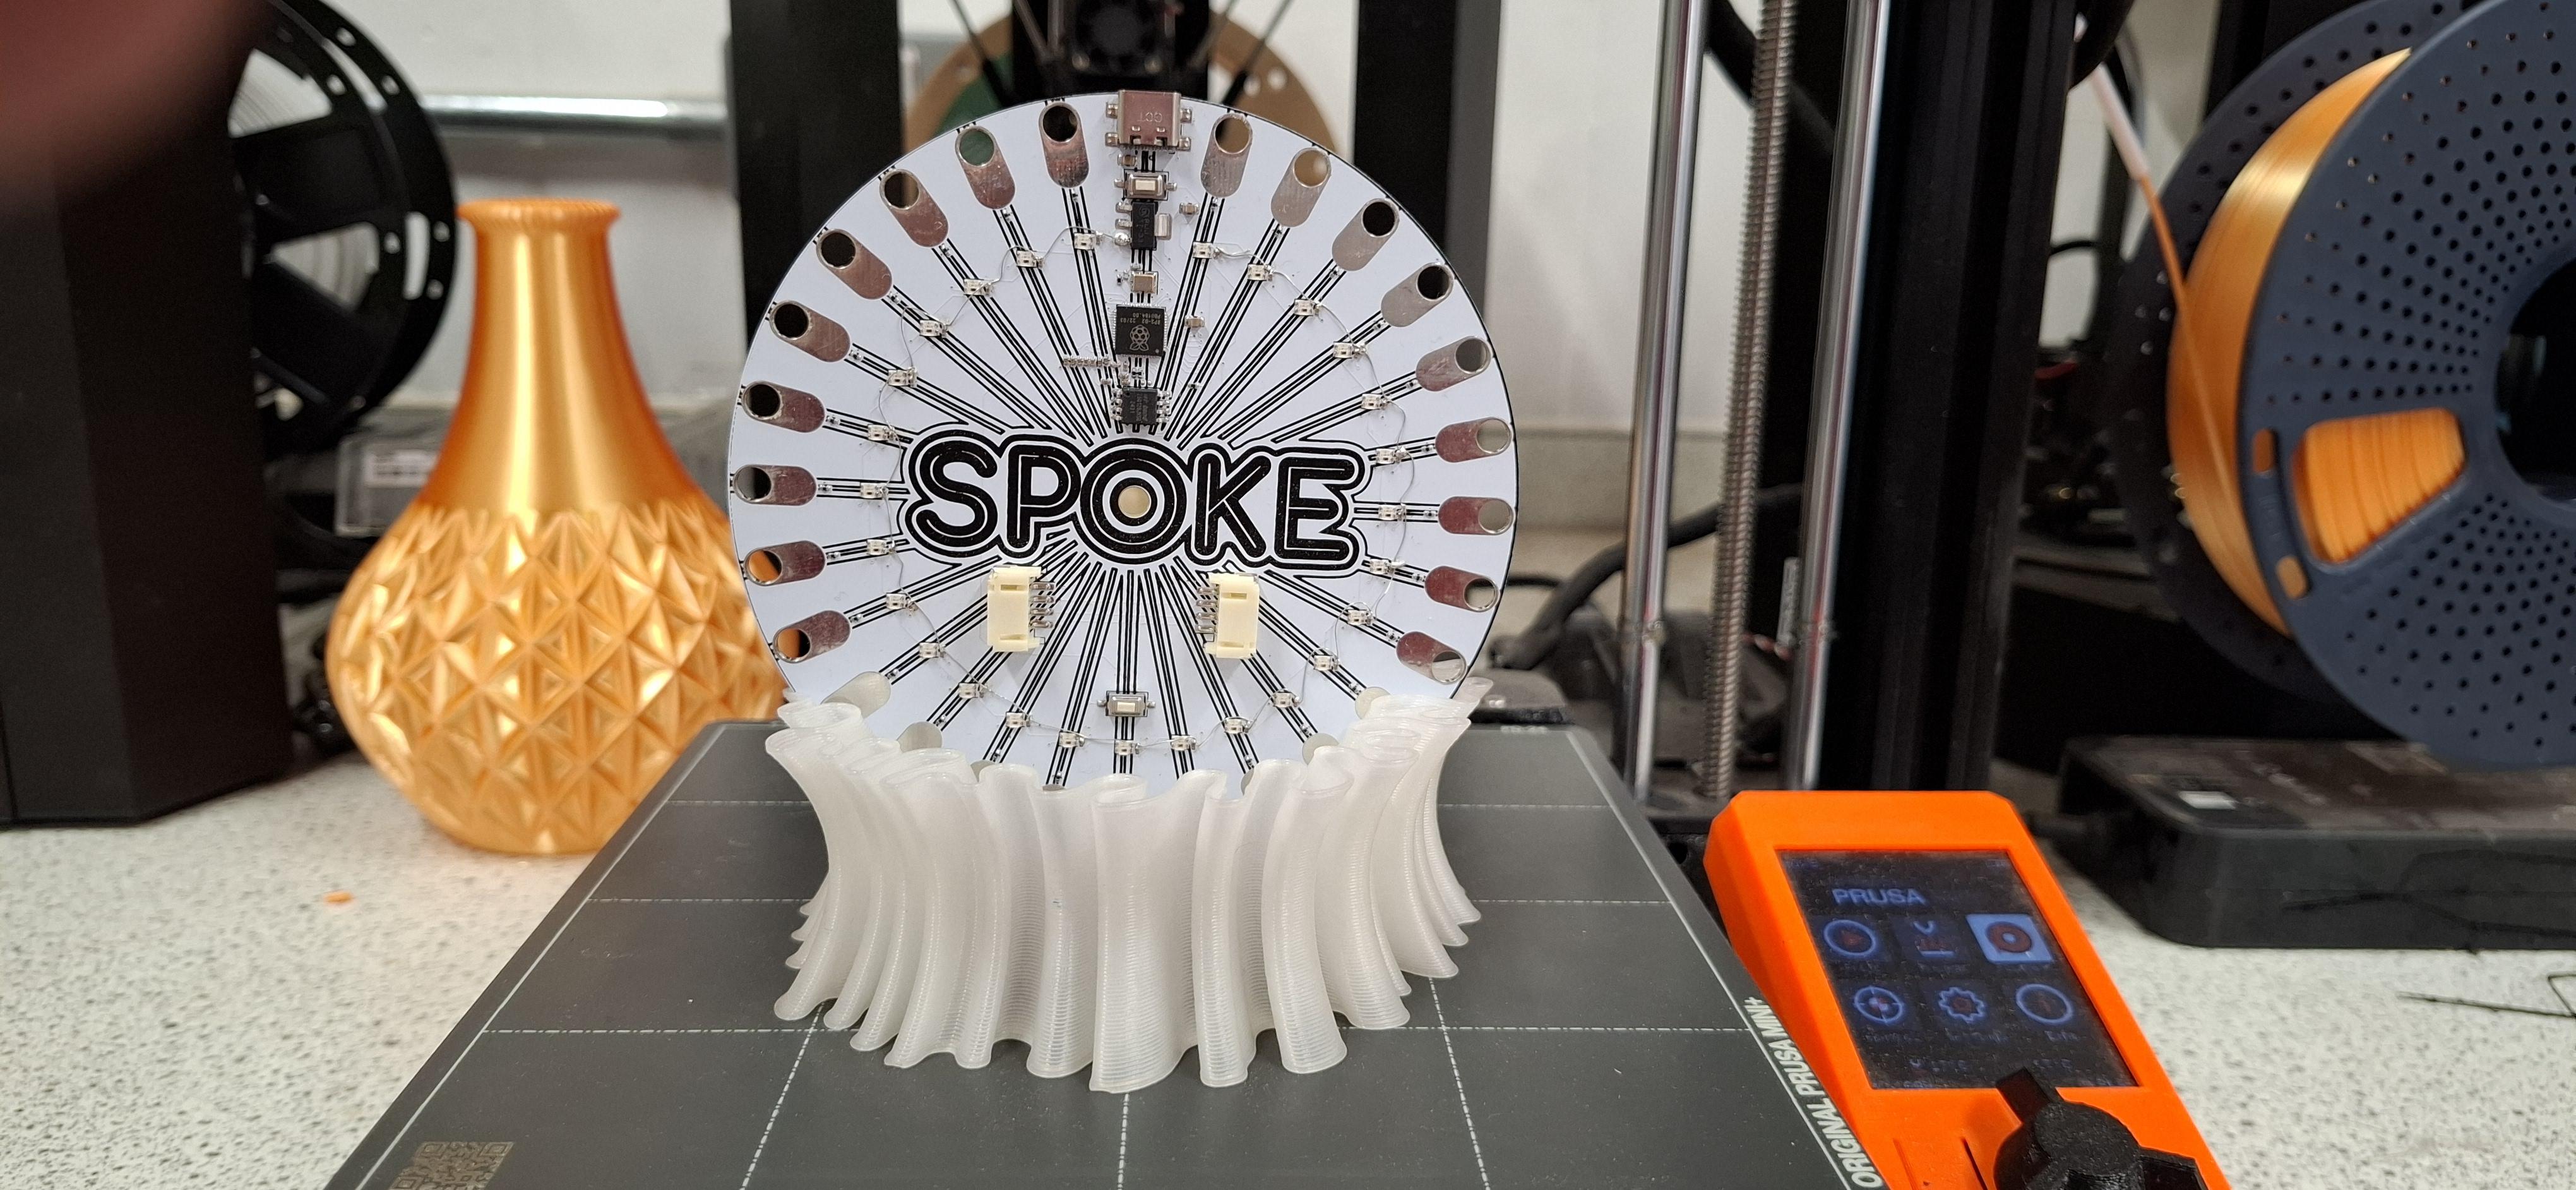
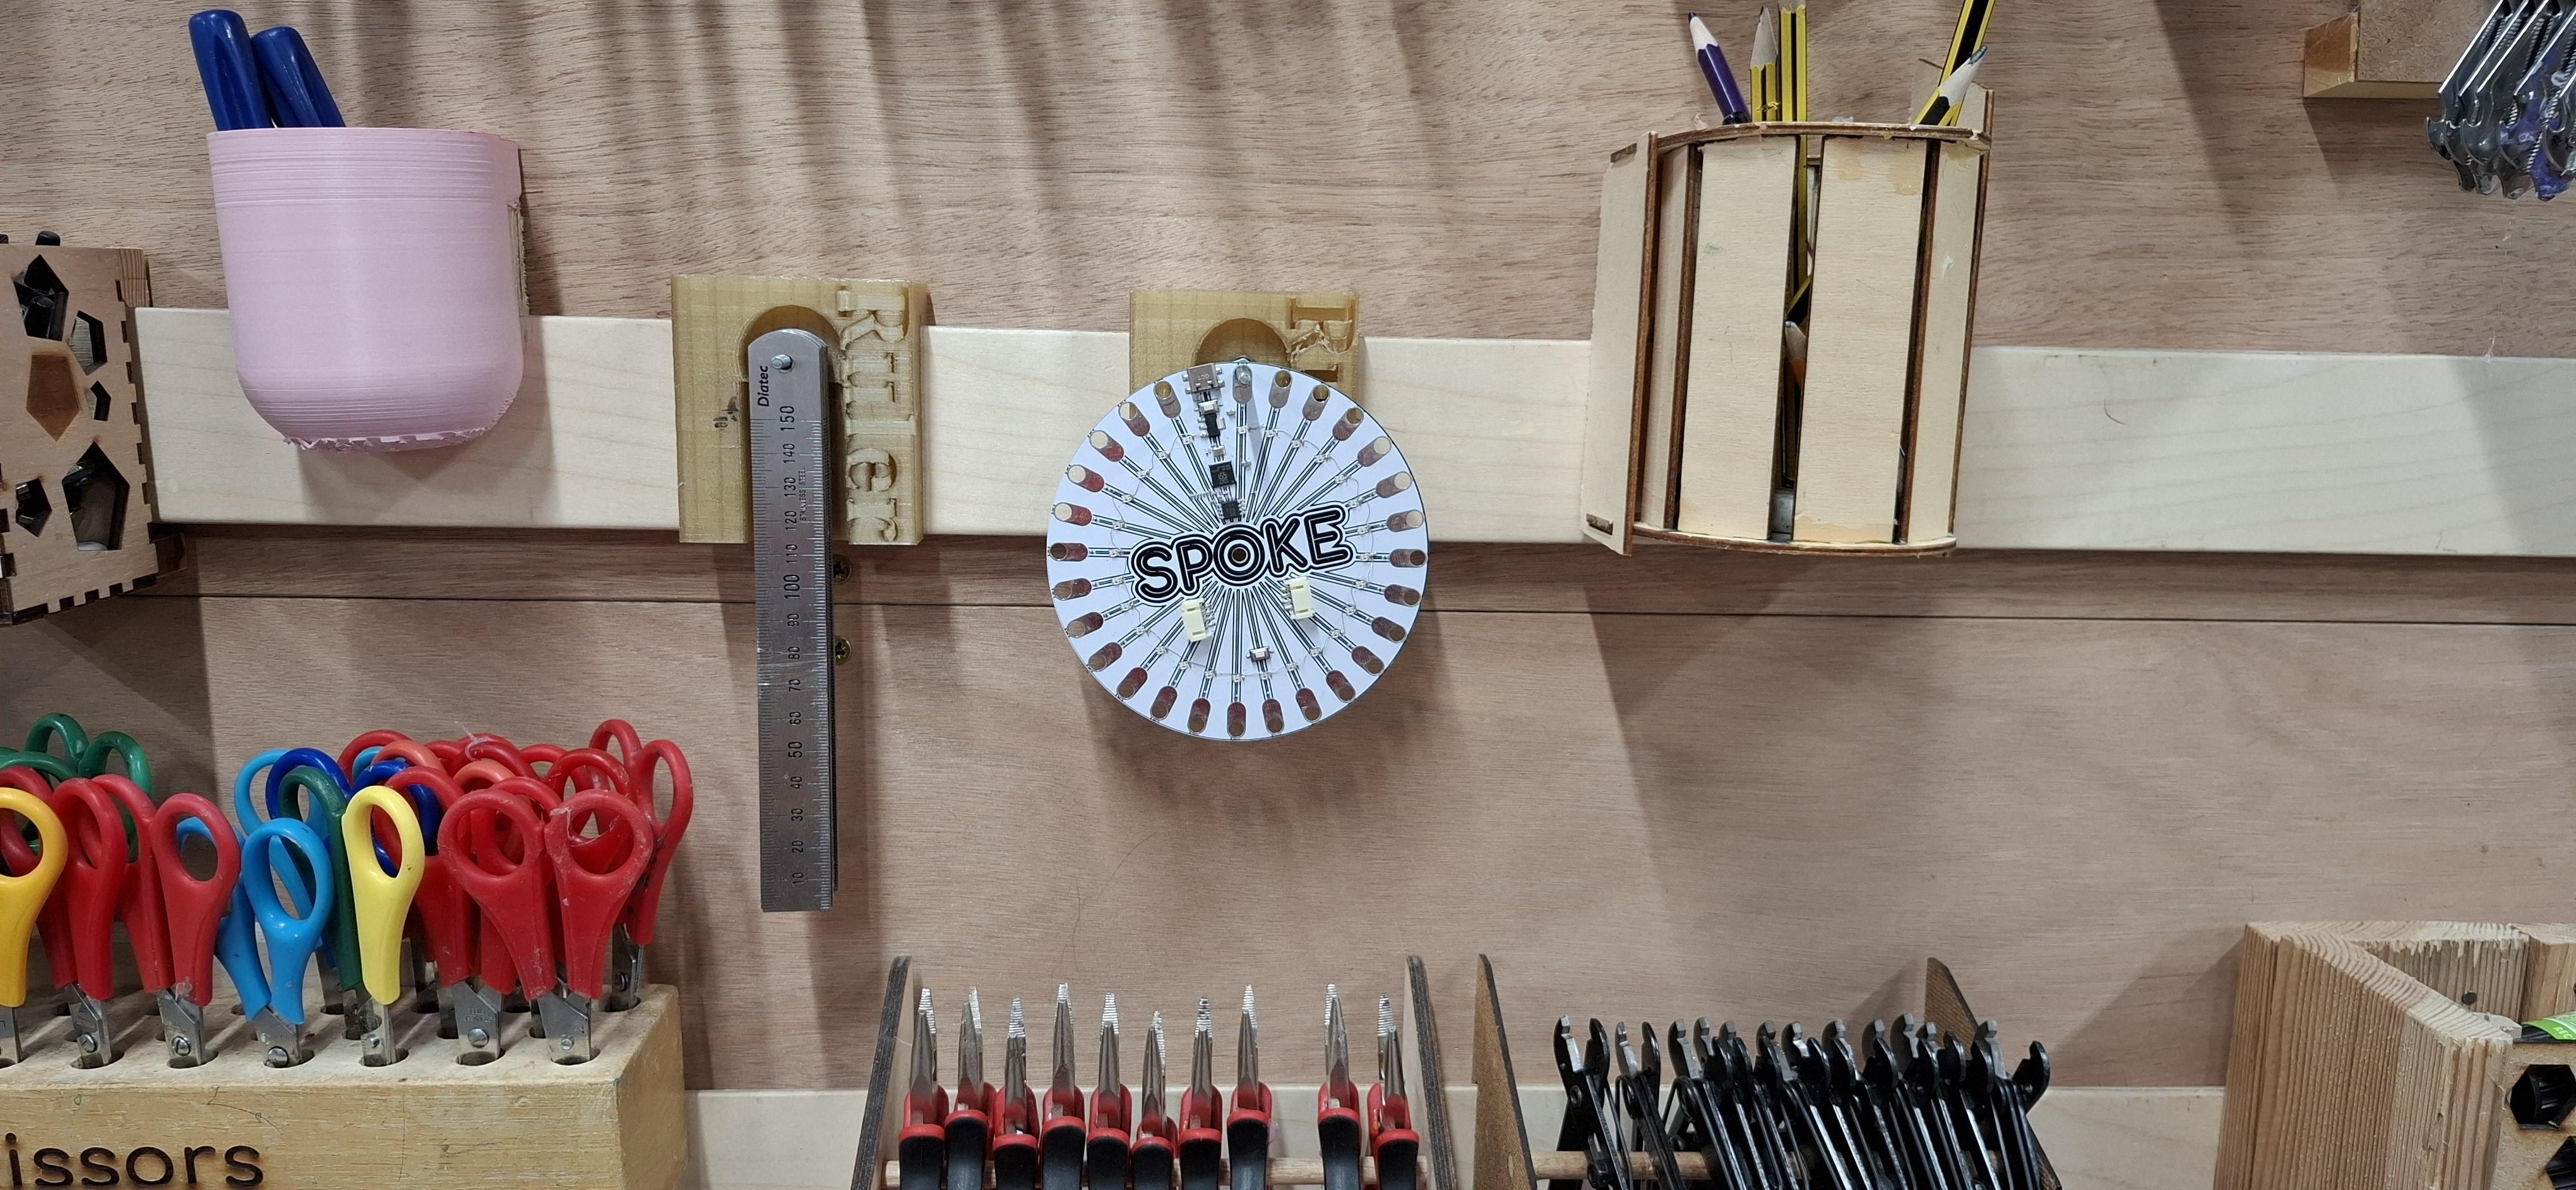
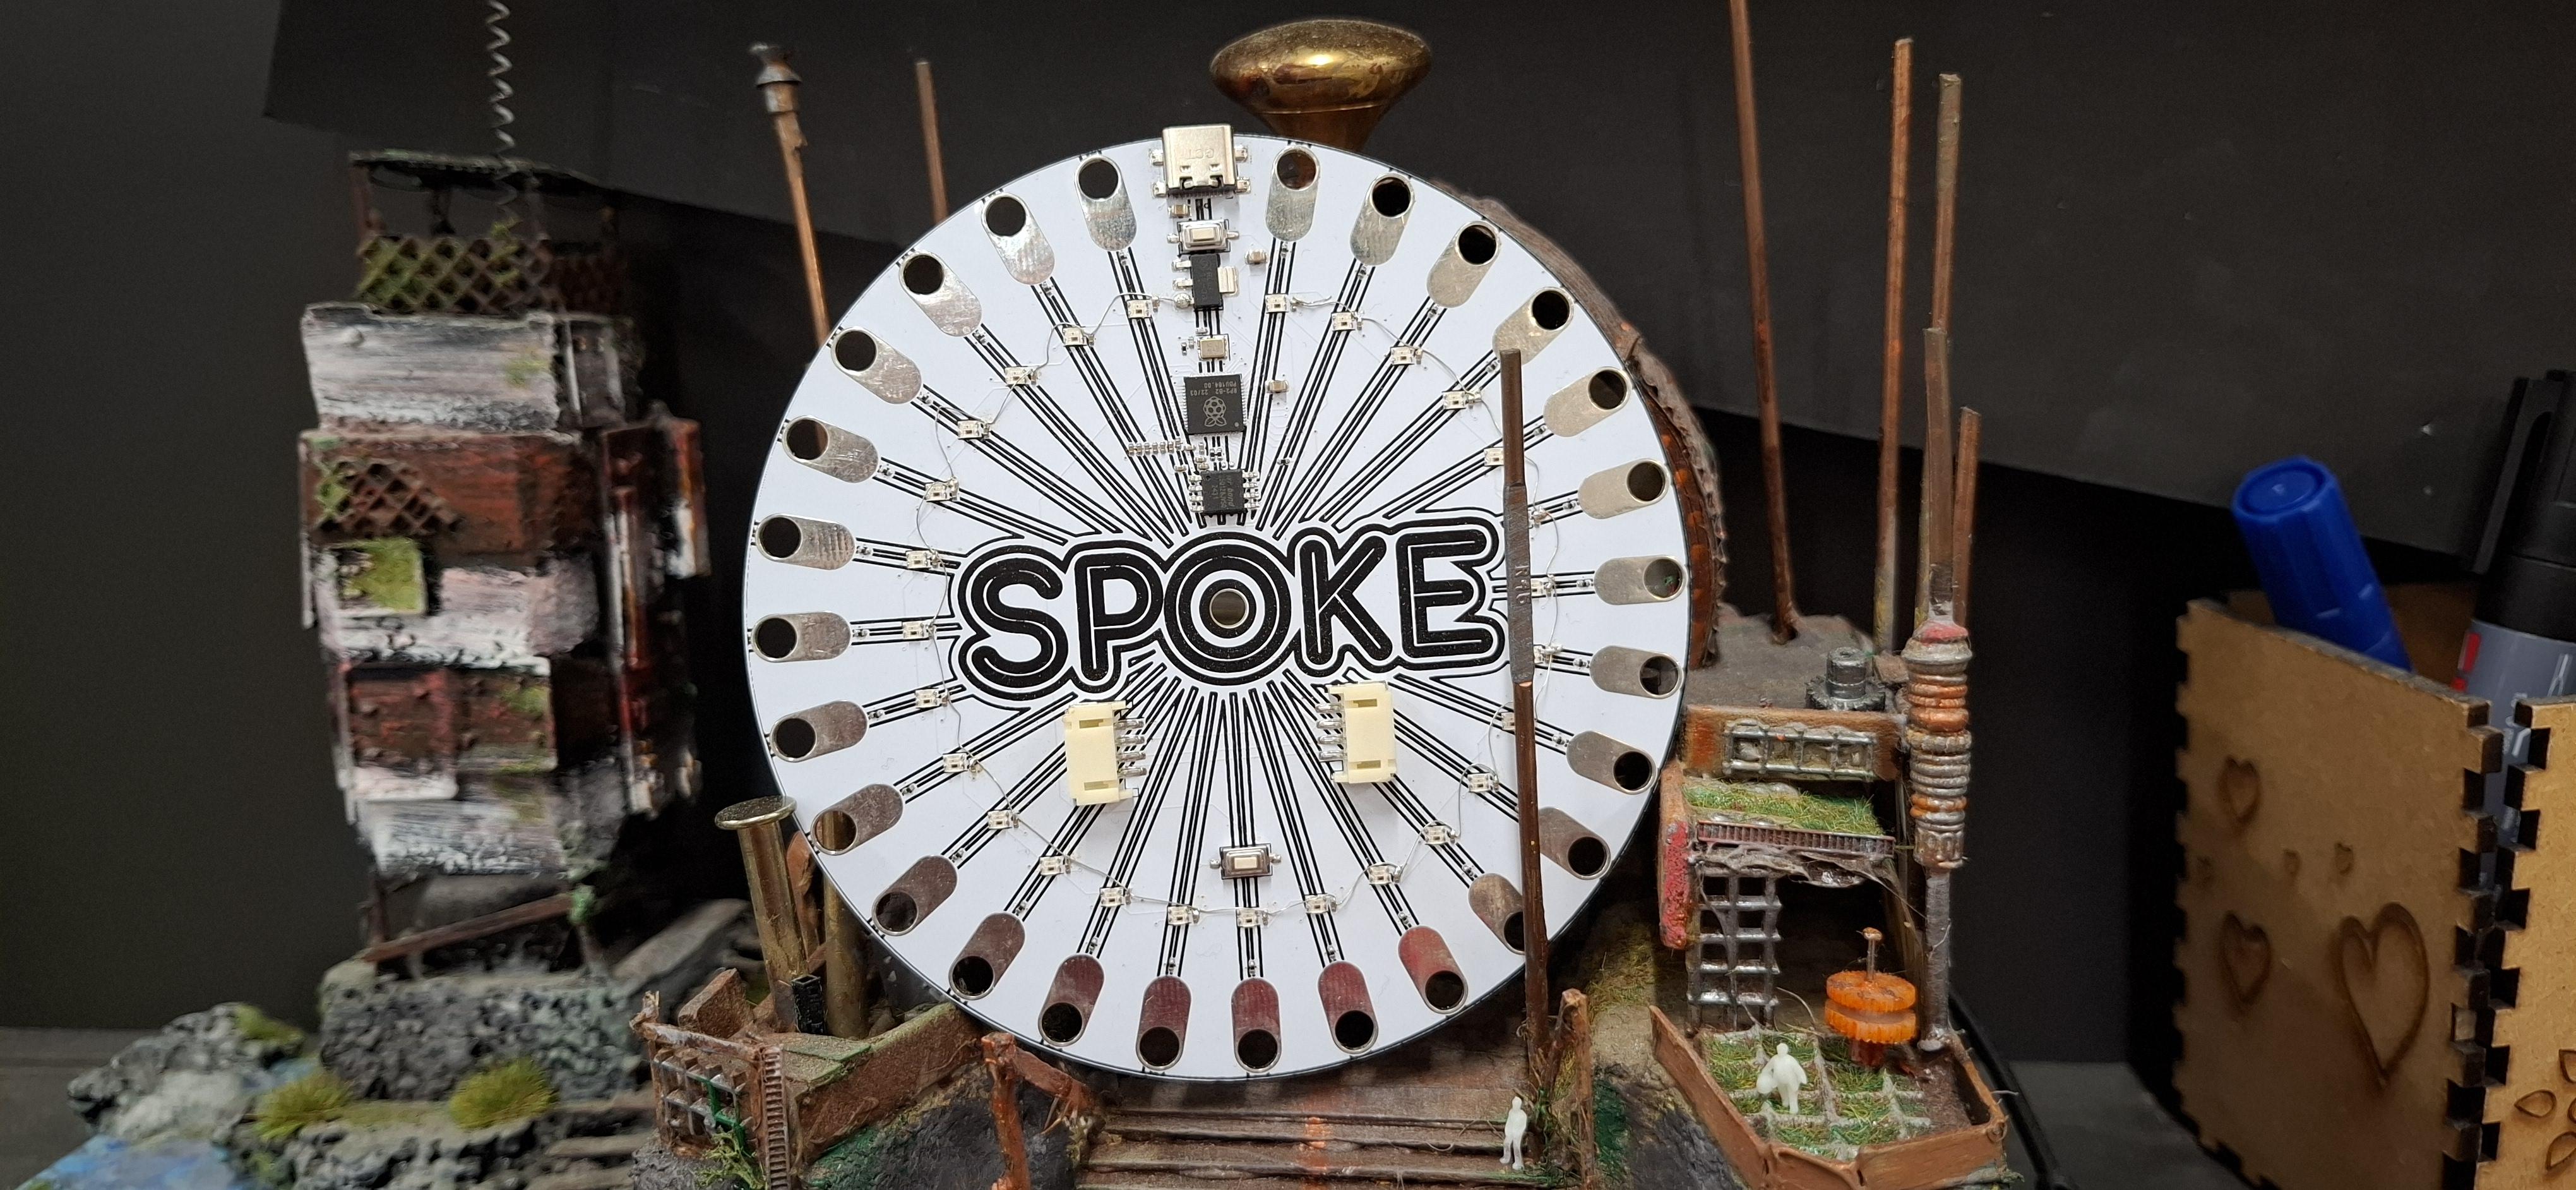
The kickstarter for my SPOKE board is going live TOMORROW.
It is a 27 pin capacitive touch board for creative computer interfacing. It runs #circuitpython on a #rp2040 chip from #raspberrypi and be used for music making, game or software controlling, education, installations, prototyping and probably a million other uses i haven't thought of yet.
No TinyGlobo this year at #FOSDEM ? That was fun to watch https://www.youtube.com/watch?v=yiX-U753VNw
Had an awesome time interviewing Tom for #HacksterCafe ! The SPOKE board launches soon on KS: https://www.kickstarter.com/projects/tomfox/spoke-touch-sensing-made-simple
It's a gorgeous and simple platform for touch-responsive #music instruments, #HIDs, #InteractiveArt pieces, & other interfaces, good for #electronics beginners (similar to MakeyMakey and Bare Conductive Touch Board – we dug into the differences on video). Based on #RaspberryPi #RP2040, it has 27 capacitive sensors w/ indicator LEDs & STEMMA QT / Qwiic!  https://mastodon.social/@TomVulpes/113867600268019530
This is a musical USB-MIDI Bonsai tree. Each branch is a touch sensor made from insulated garden wire that triggers a sequence of MIDI notes. It was made using the SPOKE hardware that I'm Kickstarting.
Sign up for updates here!
https://www.kickstarter.com/projects/tomfox/spoke-touch-sensing-made-simple
An infodump on #PsiDrive, #PlatformIO, and the #RP2040 and #RP2350.
Testing libsibo (the basis of the PsiDrive firmware) on the Pico2 has reminded me that I was planning on revisiting the tooling I'm using for libsibo.
I'm currently using PlatformIO with VS Code. The main pros are usability and portability. It's very easy for me to target multiple platforms - in my case Arduino Uno, ESP32, RP2040 and RP2350 - and switch between them using a single, simple menu. Plus it means I don't have to use cmake with the Pico SDK.
But there are cons. The main issue is that PlatformIO stopped accepting pull requests on their Pico support. Basically, PlatformIO asked Raspberry Pi Trading for a recurring fee to maintain the support, and RPi said no.
Now, there is a very popular Arduino-Pico core maintained by Earle Philhower, with a PlatformIO plugin for it by Max Gerhardt. This is what I've been using so far and it's been very reliable. I can write Arduino C code that runs on any compatible board, and then tailor the code for specific boards (i.e. directly calling the Pico SDK for a speed boost). But that might not last forever.
I've been considering making libsibo RP2040 and RP2350 for some time. ESP32 support was a temporary stop-gap before landing on the RP2040, and I didn't feel like it was the right microcontroller for the job. The Uno was where it all started, but it's far too slow for use in the eventual PsiDrive device. I think I'd be better off maintaining a separate sketch that I bundle with sibodump for people who just want to dump Psion SSDs using an Uno.
This would mean I could switch completely to the pure Pico SDK - I wouldn't be reliant on any other intermediary packages. I could focus libsibo on a single platform, a single toolchain. I could also use the Pico Probe properly.
But there are downsides. I'd no longer have the safety net of the Arduino core, plus I'd probably have to rewrite some of the code to port it to the pure Pico SDK. I'd lose the nice interface, but I'd probably swap to NeoVim anyway. Plus there's cmake, but I'm going to have to learn to use it at some point anyway.
Anyway, those are my thoughts. Feel free to reply with yours, or not.
RTC (1.9.2) for avr/mbed_nano/rp2040/mbed_rp2040/esp32/esp8266/renesas_uno by Manjunath CV
 https://github.com/cvmanjoo/RTC
Library for I2C based RTCs (DS1307, DS3231, PCF8563, PCF8523, MCP7940).
For a while I've had some fairy lights on my wall. They are connected to a Pimoroni Plasma Stick with a RP2040 microcontroller so are programmable. When I turn them on they fade-in and then have an orange flame flickering effect. Here's the code: https://github.com/acme/plasma-stick-orange-flicker
#pimoroni #led #RP2040